1. Problem
You want to know the
components that make up a rules engine policy and perform the steps
necessary to deploy and undeploy a policy to make the rule sets
available to business processes.
2. Solution
Deploying a policy
requires that several components be in place prior to the deployment.
The deployment is quite straightforward, and you can deploy in several
ways. This solution describes the prerequisites to the policy deployment
and walks through the deployment steps using the Business Rule
Composer.
A policy consists of one or more
rules. A rule comprises a set of facts. In this solution, we describe
the process to deploy and undeploy all the components that make up a
policy. Your first task is to define any facts that may need to be used
in any rules that are part of the policy:
Define
all the custom facts. Using the Business Rule Composer, open the Facts
Explorer. Define any vocabulary, schemas, databases, or .NET assemblies
that may be needed for any rule.
Once
your custom facts are completed, save and publish any vocabularies that
may have been defined. Right-click the vocabulary version, which will
be used by a rule, and click Save. Right-click the version again, and
select Publish. Once you have published a vocabulary version, you cannot
modify it directly. Instead, it must be versioned—you can do this by
copying the most recent version and then pasting a new version. The new
version can be modified.
Your
next task is to create a new policy and add all the rules that are part
of the policy. In the Policy Explorer, create a new policy, and add one
or more rules. As you create each rule, reference the appropriate
version of the vocabularies, which have been published.
Save, publish, and test the policy by right-clicking the policy version and selecting the appropriate menu item.
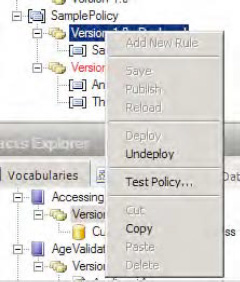
The
final task is to actually deploy the policy. Once the policy has been
deployed, it cannot be deleted unless it is first undeployed. In the
same manner as the vocabularies, it cannot be modified unless a new
version is first created. Deploy the policy as follows: right-click the
policy version that is to be deployed, and select Deploy. You can
undeploy policies by selecting Undeploy, as shown in Figure 1.
3. How It Works
You have two basic
approaches for deploying and undeploying policies. The first is to use
the Business Rule Composer. Using the Business Rule Composer, you can
define facts and policies that can be modified, published, and deployed.
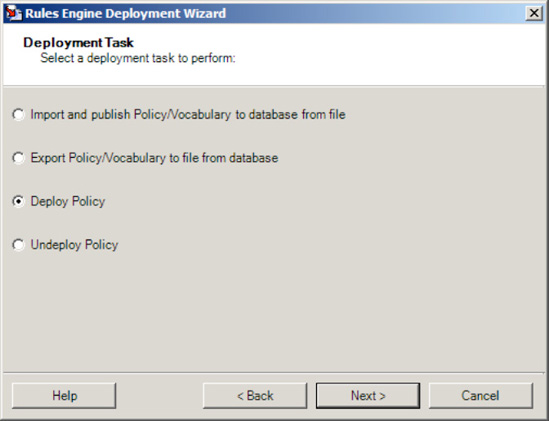
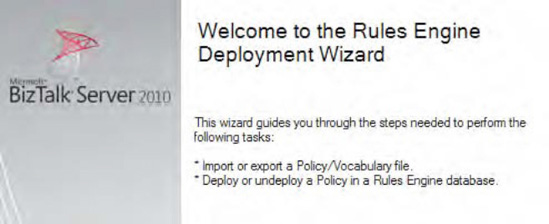
The second is to use the Rules Engine Deployment Wizard (see Figure 2). The wizard allows policy files to be exported and imported onto machines where they may not have been created.
Use the following basic steps to deploy a policy in a distributed environment (See Figure 3 for all options):
Export
the policy file. Open the BizTalk Rules Engine Deployment Wizard on the
machine where the policy was created. Select Export Policy/Vocabulary
file from database. Walk through the options, selecting the policy you
want to deploy on a target machine. This process will create an XML file
(or multiple files if exporting multiple vocabularies and policies)
that can be copied to another machine.
Copy
the XML file(s) created in the first step to the target machine. Open
the wizard on the target machine, and select the Import and publish
Policy/Vocabulary to database from file option. Walk through the options
to publish the data to the target machine's rules engine (the
vocabularies must first be deployed, and all referenced .NET assemblies
must be placed in the GAC).
Run
the wizard again on the target machine. This time, select the Deploy
Policy option. All policies and vocabularies that have not been deployed
will be available in the drop-down list. Select the object(s) you want
to deploy, and walk through the rest of the wizard. The vocabularies and
policies can now be referenced on the target machine by orchestrations
or other components.
To
undeploy, follow step 3, selecting Undeploy Policy rather than Deploy
Policy from the first option list. Only those vocabularies and policies
that have been deployed successfully will be available for undeployment.